It might be challenging to install any unknown software or module since it necessitates a thorough understanding of the system requirements, software or module settings, and other similar aspects. I frequently see multiple OpenCart users who are having trouble setting up this e-commerce system on their computers. The OpenCart platform, an open-source shopping cart program, has rapidly grown in popularity among diverse owners of eCommerce stores.
To integrate exciting new OpenCart extensions and functions into your business, you must periodically update your platform. Various versions of OpenCart have been launched thus far. You will be guided through the fundamental steps in the tutorial to update OpenCart from one version to another.
This blog will assist several users in smoothly upgrading their current OpenCart platforms to the new version.
How can I update OpenCart to a new version?
Ensure that your platform is backed up
You must use FTP or your hosting control panel to download a copy of the OpenCart files to your computer from the web server. You must use phpMyAdmin to export the database. Alternatively, you can back up the database by going to OpenCart dashboard -> Tools -> Backup/Restore.
Make a backup of your OpenCart store
- For the sake of preventing any issues during the upgrade process, make a backup of your store.
- Download the most recent iteration of OpenCart.
- Check the link to obtain the most recent version.
A zip file containing the download will be accessible. To install the needed version, the user must unzip the installer file to a location specified on the machine.
The updated OpenCart version has to be uploaded to the server
Now you may upload the web files using the File Manager in your cPanel hosting control panel. In addition, users can upload data and web pages from a computer system to a web server using FTP tools. You will be given the option to select overwrite to apply modifications to all of the files on the web hosting account with the same name and replace them with the new OpenCart files when you are asked how to handle files with the same name throughout the uploading process.
The installer file will be unzipped, and you’ll see an “upload” folder there. All of the files and subfolders on your computer system must be uploaded to the web hosting, with the exception of the files upload/config.php and upload/admin/config.php. Regardless of the OpenCart version you are upgrading to, it is necessary to make sure that these two files are left out of the upload process in order to prevent their overwriting.
From a web browser, install the OpenCart software
- Install the OpenCart software
- To ensure a trouble-free upgrade to a higher OpenCart platform, follow the easy stages of the upgrade process.
- An “install” subfolder is present in the OpenCart root directory for each new OpenCart installation. It’s now time to open the web browser and run the auto-installer.
To do this, first launch your PC or Mac’s web browser, and then type the domain name into the address bar. To launch the OpenCart auto-installer, you must add /install/ to the end of the website’s URL in your browser’s address bar and then press the Enter key. It will take less time than a brand-new installation because you are upgrading an existing version.
Tips for a Problem-free OpenCart upgrading
It is time to follow these quick, easy recommendations for the necessary process if you want to upgrade your OpenCart store without any issues.
- The upgrade script failure issues must first be posted in the forums.
- Clearing browser cookies after the upgrade are complete is crucial for preventing token errors.
- To tell your browser to update the CSS modifications, first load the admin page and then click the Ctrl+F5 keys twice.
- Users of OpenCart must now navigate to Admin > Users > User Groups, where they must edit the Top Administrator group. It is suggested that you tick every box there.
- To edit the primary System Settings, you must first visit Admin. Regardless of the modifications you have made, it is also advised to update all the fields before selecting the save option.
- To instruct the browser to make the necessary changes to the CSS, the user must load the storefront and hit Ctrl+F5 twice.
Note: Ignore any error messages you may see from the front page or your login-related admin dashboard, such as “Use of undefined constant DIR MODIFICATION OpenCart upgrading error,” and carry on with the upgrade process.
Any store owner may easily update their existing OpenCart installation to the desired higher version by properly following the step-by-step steps provided in this blog post.
Therefore, if you intend to improve your store, do not be put off by the technicalities because they can be dealt with and taken care of easily. The shop upgrade is now a must following the introduction of OpenCart 3.0, the most recent version. Your eCommerce store can become much more straightforward and successful thanks to OpenCart 3.0’s new and beneficial enhancements and greatly improved admin interface.
Why should you update to OpenCart 3.0?
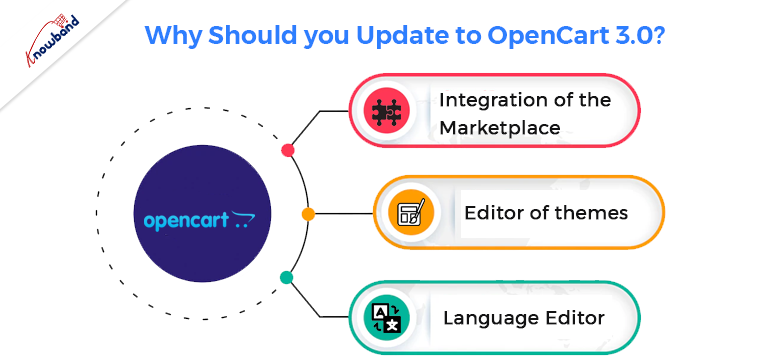
There are not many significant changes in the most recent version 3.0. Below is a discussion of them:
Integration of the Marketplace
The platform’s marketplace has thus far had the most impact. To enable the multi-vendor option, you may now purchase the OpenCart marketplace extension and install it in your store. It could only be accessed through the official website prior to the introduction of this version.

One such multi-vendor marketplace plugin from Knowband can transform your business into an entirely new market.
Editor of Themes
The platform’s themes can now be changed directly from the admin interface using Twig language thanks to the enhanced Theme Editor. The theme editor is simple to use and comprehend. It enables you to change three key components, namely the themes, pages, and the code of the individual pages. Now that you have access to the back end, you may alter your storefront and enhance the overall appearance of the website.
Language Editor
The Language Editor feature in OpenCart 3.0 enables the store administrator to change any text in the store. Without requiring the cumbersome installation of any third-party translation add-ons, the contents can be translated into a selected language. Now, translating a text only requires a few clicks.
Final Words
You should use the different OpenCart extensions from the Knowband shop, which are brimming with capabilities if you want to further enhance the functioning of your online store. Visit the Knowband store for additional details on other Magento extensions, PrestaShop addons, or OpenCart modules. Get in touch with us at support@Knowband to know further details about the latest version and its update process.


