Is the multi-checkout process leading to higher cart abandonment rates? Now, is the time to switch to Opencart One Page Checkout offered by Knowband. It makes the Opencart store’s checkout procedure easier.
Opencart One Page Checkout
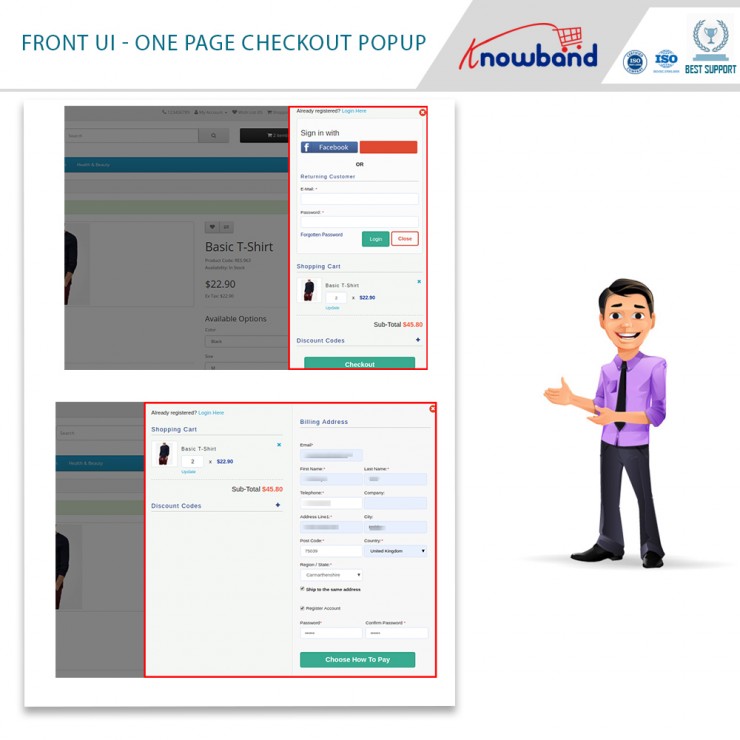
Opencart One Page Advanced Checkout Extension is a great way to provide a smart as well as a rapid checkout option to your eCommerce business. Furthermore, it showcases a responsive checkout window without requiring additional page loading and lowering cart abandonment. This even increases consumer engagement.
Motivating customers to finish their orders is not simple hence Opencart One Page Checkout is a must-use module.
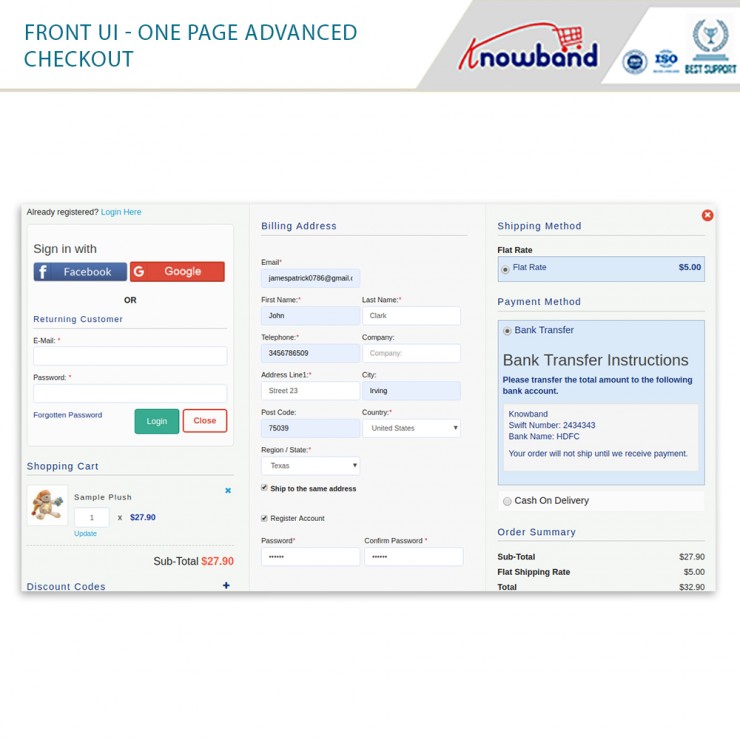
One Page Checkout for OpenCart offers various benefits and one of them is to log in through social accounts. As a result, you can login through a Google account. With the Opencart One Page Checkout, you can also set up Google Login. Let’s understand the benefits of login in through Google.
What are the benefits of login through Google?
Log in through Google offers various benefits such as people will have to remember one fewer login. Further, conversions become easier, especially on mobile phones. Google login also gains access to a wealth of visitor data for a more tailored experience.
If you are irritated with spamming, logging in through your Google account leads to less spam as well as mistargeted messaging. Moreover, the issues of cart abandonment reduce and give you a sense of security. Also, there will be fewer failed logins.
How to setup Google Login using Opencart One Page Checkout?
To set up a Google Login account, follow the steps mentioned below to receive the client id and client secret.
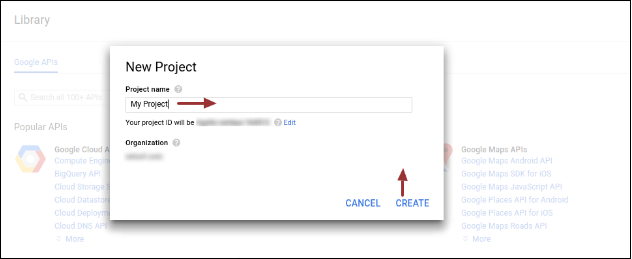
1. Visit ” https://console.developers.google.com/project ” and click the link.
2. Select “Create a project” from the drop-down menu highlighted in button ” 2 “.
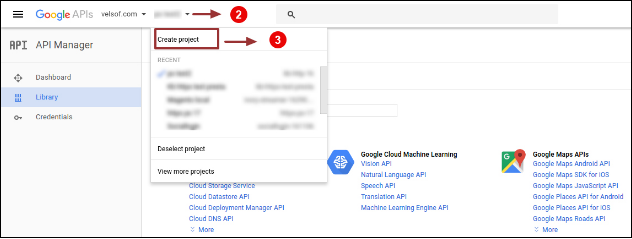
3. Click “Create” after entering your preferred Project Name.
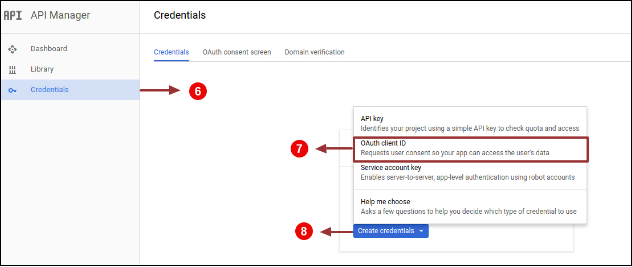
4. Go to API Manager, click Create Credentials, and choose OAuth client ID from the drop-down menu.
5. From the drop-down menu select configure consent screen”.

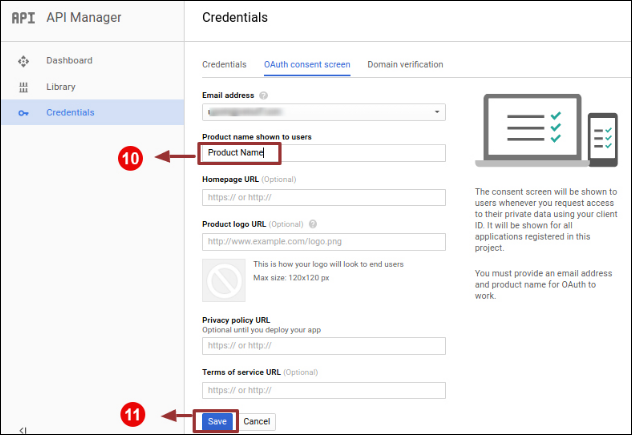
6. Click the “Save” button after entering “Email Id” and “Product Name.”
7. Click the “Create” button after selecting “Web application,” entering “Name” and “Authorized Redirected URIs” as described below.
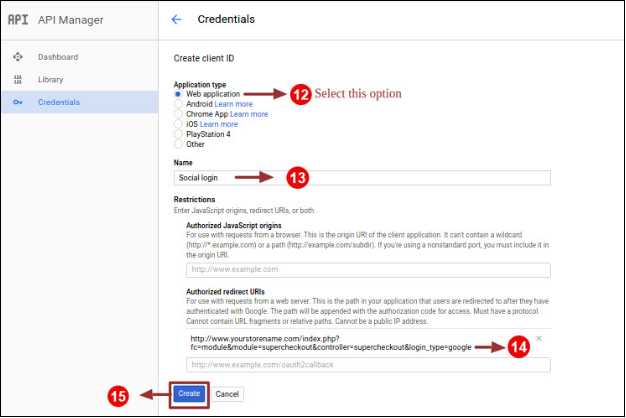
Use the following redirect URL: http://your store url/index.php?fc=module&module=supercheckout&controller=supercheckout&login type=google&login type=google&login type=google&login type=google&login type=google&login type=google&login type=
8. Make a note of the Client ID and Client Secret.
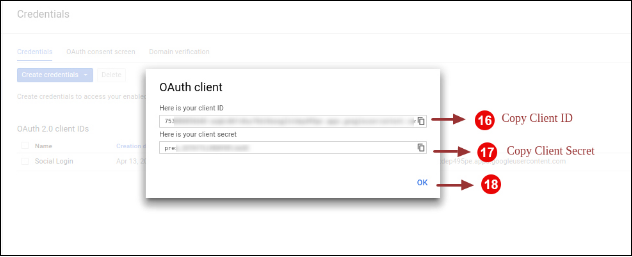
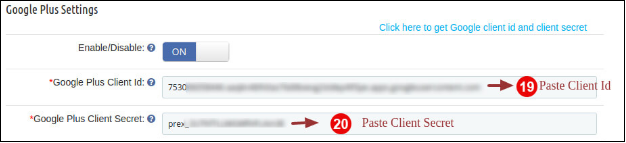
9. The last step is to paste Client ID and Client Secret in the Text Field in the Prestashop One Page checkout module’s admin panel.
A final note on Opencart One Page Checkout
A lot of consumers are forced to quit the business as they get frustrated by multi-steps henceforth it’s really essential to enhance the site’s checkout process. One of the biggest reasons to abandon their cart is the lengthy and confusing checkout process as one out of every ten online consumers is forced to abandon their cart. Hence, implementing Knowband’s OpenCart One Page Advanced Checkout Extension can make your site checkout more exciting.
Why Knowband?
Knowband, known for providing some of the efficient plugins for various eCommerce platforms, and Opencart is one of them. Even if you have your store on Prestashop, WooCommerce, or Magento, you can utilize Knowband modules. They enhance the functionality of your business. You may write to Knowband at [email protected].


